Monday, 27 October 2014

The Tan Commandments


Summer is a distant memory and if you are like myself and are unlikely to catch any rays until Easter, ( I know what a dismal thought) then you'll be back to applying tan, then tan detox, then apply tan, tan detox and so on. 

I love a little glow throughout the winter it hides my blue/greyish Celtic skin tone, so here are some tips on how to achieve the perfect tan, more like a little sun kissed rather than looking like you've rolled around in a bag of Doritos. 


     1. Thou shall always choose a tan that suits your skin tone
It's winter, so less is more. Try to stick to gradual tan or a tanning gel, which will leave a more subtle tone.

2. Thou shall not ever Ever tan without a mitt
Yes a mitt,  not an ex foliation glove, sounds so obvious but,  A friend of mine made this ludicrous tanning error.  The mitt will Not only enhance the results and leave you streak free but it you will save your palms form the dreaded orange look.

3. Thou shall not leave any area untouched
It doesn't matter if you go over an area a few times as it won 't go patchy, but leave an area without tan then expect to have the streaky bacon effect. 

4. Thou shall always put moisturiser on hands and feet and then apply tan
I know this sounds a little daunting but, moisturising the skin on the hands and feet directly before applying tan might look messy initially - the next morning when you wash it off you will have the perfectly blended tan 

5. Thou shall never leave tan on longer than the recommended development time
I just don't get it when girls insist on leaving their tan on till the next day, believing that it will get darker well it doesn't make the tan any darker, it just makes you look dirtier for longer. If you want to have a darker tan then do another application the following day... Simples 

6. Thou shall not shave the day of your tan 
This will leave you with with a nasty rash and when your tan develops it will look like your covered in tiny black dots... Not a good look 

7. Do moisture daily to make your tan last 
This will ensure your tan lasts and also it will prevent you from looking like you have leprosy on the third day.

8. Thou shall never spray deodorant or perfume on a tanned area
The alcohol in the perfume & deodorant will make the tan turn green and a green neck or pits is not very attractive. 

9. Do rub ice cubes over your face to seal your pores before face tanning. 
A personal favourite for myself as I've saucer-like pores, if I apply tan straight to my face it looks like I have a mass of blackheads the next day. So rubbing an ice cube over my face and then putting a little moisturiser on before I apply the tan leaves me with a authentic looking tan. 

10. Exfoilate, Exfoilate and Exfoilate some more 
Exfoliation is the keys to a flawless tan, it's all in the prep work. Removing the dead skin will leave you with  fresh, soft, smooth skin. The tan will glide on better and therefore develop more evenly. 


Here are some of my favourite lighter tans 

Xen tan - gradual tan transform luxe £18
http://goo.gl/N5fXCU

Xen tan - gel £18.74
http://goo.gl/l5weNp


Creme de la mer - face and body gradual tan £65 
http://goo.gl/VT1TI7


St Tropez - classic tanning mousse £22.45
http://goo.gl/LNSciq

Madame la la - £36
goo.gl/KII2li


How now brown cow - £19
http://goo.gl/0Ip4KJ


Friday, 17 October 2014

The best face paints for Halloween


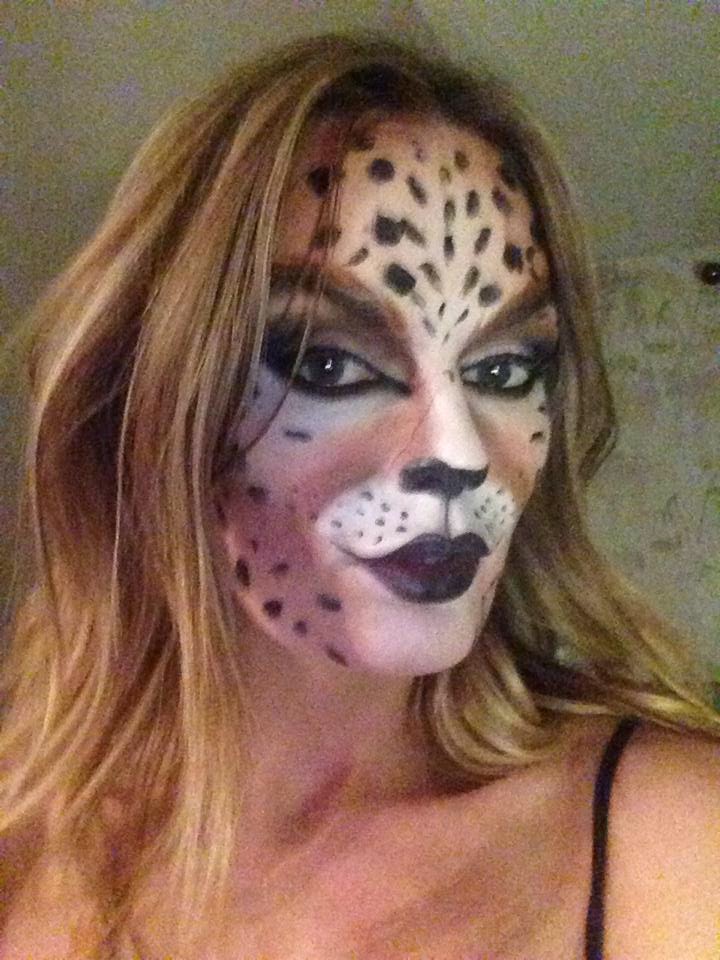
Every makeup artist loves Halloween, the perfect time to go mental with makeup. Here are the perfect products to create long lasting looks.

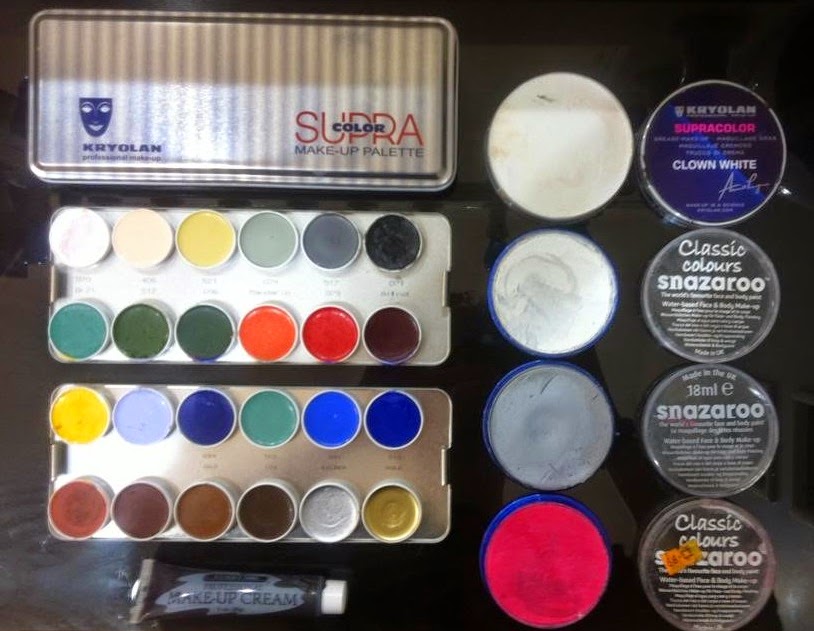
Krylon facepaints are my favourite for all sorts of ghoulish Halloween looks but you can also use the face paints with regular makeups, I often use the white in the supra Color palette to have a defined eye look, just mix it with a fixing agent and then pack white sharper over it. It's very effective and long lasting. 


The products I used and where to find them


Monday, 13 October 2014

The right way to clean your make up brushes


Washing your brushes is so important. If you think about it, there is so much dirty makeup, oil and bacteria trapped in an unclean brush, and if you don't wash them properly your just rubbing that all back into your skin! ew!

All those fancy brush cleansers can be really expensive to repurchase over and over again. This technique is used by oil painters and artists to keep their brushes in perfect condition and it works perfectly on your own make up brush too.  

These items can be found in your own home so basically you don't need to buy anything! score!


What you will need

A plate
A basic type of dish soap, i'm using fairy liquid. This is to disinfect and cleanse
Extra virgin olive oil (to recondition the bristle hair after its been stripped of oils and disinfected by the soap)
Brush guard 
A cup


Step 1

Put the washing up liquid and extra virgin olive oil onto a plate, don't worry if both the liquids touch just don't mix them.


Step 2

Dip the brush into the fairy liquid and rub on the palm of your hand under cold water, hot water will make the brush hairs brittle and the glue that holds them together melt.


Step 3
After you have removed the fairy liquid from your brush,  rub it into the oil then massage it in with your fingers and wash off under cold water.


Step 4

  dab your brush down with a towel. Don't rub at it as it will make the hairs frizzy. 


Step 5 
If your serious about the condition of your make up brushes invest in good brush guards. Place your brushes in to the guards and place upside down in a cup. Make sure these are upside down as if they are the right way up the excess water from the brush will go inside the handle of the brush and weaken the glue the hairs are attached by, causing your brush head to fly off mid make up application.
  I recommend these


get cleaning! 

Friday, 10 October 2014

10 makeup brushes I cant live without


If your anything like myself you've makeup brushing lying everywhere, but really we only need 10 brushes to complete our kit.


Yes believe everything you hear. Makeup brushes are the most important part of your makeup kit and are vital for that professional flawless finish. 
Here are my top 10 brushes that no girl should be without, so give your fingers a break and invest in these tools of the trade.


1- foundation brushes 
A choice of 2 here,

Precision cut deluxe synthetic hair 

Gives a flawless airbrushed finish 

Perfect with liquid foundations, powders and minerals

Densely packed, super soft brush

Saves time Saves the amount of product use 

Stylish packaging and branding


A large full circular brush used for lightweight application and 

blending of face powder or pigments. Use to create soft layers or 


add textures. Made from a soft blend of goat and synthetic fibres.


2-concealer brush 


A taklon hair brush, great for concealer and perfect for under the eyes.


3- powder brush 


Full and dense for dusting loose or pressed powder on face or

 body. This brush is particularly good for blush application with 

soft fibres that form a full, rounded shape 
4-blush brush 


Small Chisel Blush is a luxurious little blush/contour brush made of 

top quality sable and goat hair

http://www.crownbrush.co.uk/c403-small-chisel-blush.html


5- bronze brush 


Use this brush to achieve the perfect cheekbones, use with bronzer or highlighter to define the contours of your cheeks


http://www.gordonsdirect.com/real-techniques-retractable-kabuki-brush.html


6- slanted eyebrow brush


I always prefer a slanted brush for the brows, soft natural hair with synthetic fibres, so it great to use wet or dry. Available 
at http://www.orlaghmaye.com/index.php/eyebrow/angle-definer.html


7- flat shadow brush 


Subtle or loud, fierce or classy, this split fibre brush allows 


you create the perfect eye look your after with its signature 

mixture of goat hair and synthetic fibers


http://www.maccosmetics.co.uk/product/145/17362/Products/Brushes/Eye/235-Split-Fibre-All-Over-Eye-Brush/index.tmpl


8- crease brush 


Using just the tip of the badger hair bristles it’s perfect for picking 

up colour. Apply product directly onto the crease and sweep 

through. Effect is blended, but defined.

9- smoker brush 


For precision shading on lid, in eye crease or along lash line. The 


soft, smooth fibres of this brush are gathered into a pencil-shaped 

tip. It is ideal for blending eyeliner into eye shadow to create a 

smoky looking eye

10- lip stick  brush 


This dual-purpose brush can be used to outline and paint lips or to 

precision-apply concealer.

http://www.thebodyshop.co.uk/make-up/brushes-and-tools/lipstick-concealer-brush.aspx 


What is that old saying "only a bad workman blames his tools", will as far as I'm concerned a really good makeup artist , uses really good brushes. Not just expensive ones but good quality ones. I know when your buying new brushes there are so many, it can be really intimidating especially when you haven't a degree in makeup artistry. So, basically this is the simplest rule to follow. 

# synthetic hair - for liquids or creams (foundation, concealer, lipstick etc)

# natural hair - for powders (blush, shadow, bronzer) 

Monday, 6 October 2014

Harlotte smoky brown eyes


October is upon us, so I thought I'd do a quick warm smoky eye look for those cosy autumn nights.

I took my inspiration from Cara Delevingne, she loves a brown smoky eye!

http://www.blacklockbeauty.com/wp-content/uploads/2014/04/cara-delevingne-wearing-burberry-make-up-to-the-metropolitan-museum-of-art-2013-costume-institute-gala1.jpg


For this look I'll go with Harlotte smoky brown palette at £45 but now on sale for only £38 here 
http://www.orlaghmaye.com/index.php/makeup/eyes/eyeshadow/harlotte-smoky-brown-palette.html


Four matte shades and one shimmer 

1- dark brown matt
2- black matt
3- lighter tan matt 
4- ivory shimmer 


Team it with harlottes lipstick in exposed £15. On sale now here 


Harlotte eye shadow palettes are a personal favorite of mine, high impact, pigmented, durable and long lasting. They probably seem a little highly priced but I promise you won't be disappointed!