
I was giving this amazing skin care range Eleni to try and it has actually blown me away.

Before my review I'll just give you a little background information on the Eleni range.
So, What is Eleni?
Eleni originated from South Africa and is the result of 25 years of dedicated research into various skin conditions.
Why is Eleni so special?
Eleni created truly effective lipsomal skincare treatments that nourish, protect and restore the skin.
But what are Liposomes ?
Liposomes deliver peptides, herbal extracts and antioxidants to the deeper layers of the skin. This basically means the liposomes get all the goodies into the deeper layers of the skin, leaving you looking plumper, younger and healthier.
So, I'm just at the end of my trial with the five little tester pots, and I'm sure I've mentioned once or twice (possibly 200 times before), my skin is super sensitive! So therefore I was just a little reluctant about trying another new range but thankfully my over sensitive dermis responded exceptionally well to the products, so, to say I'm impressed is an understatement.
I obviously have my favorites like in any range but I'll just give you a little run through the retail products I reviewed.

Blemishless cream £22
A few days before my period is due every month without fail I have a mild breakout, last week was an exceptionally bad breakout. I was again a little hesitant to try a breakout cream as any I have tried in the past have tried my skin out rather than help the spots to heal. So I used the cream for 2 consecutive nights.
I was completely Blemish less by the next day. Perfect not even a bit of dry skin, just clear clean and smooth.
Eye contour soothing cream £35
I started using eye cream when I was 26, I just love the rich feeling of it on my eyes especially before I sleep. This is a rich cream, it is soo refreshing on the eyes, hydrating, moisturising and soothing especially around the sensitive eye area. Loved it.
Facial deep cleanse £25
I love a good cleanser, and with the amount of make-up I play about with during the day I need something that works, and I found this in the "facial deep cleanse". The best way I think to apply this cleanser is, dampen the face with warm water and gently massage the cleanser into the skin, then simply wash it off.
Mild stabilising moisturiser 29
The moisturiser has a velvety finish on the skin. I found when massaged into my skin it was left feeling calmed, moistened and smoothed a perfect base for applying make-up. If I can use this on my sensitive skin anyone can use it so I think it would be perfect for all skin types.
Re constructive serum £39
I found with this anti ageing serum it did react a little to my skin but I wouldn't let that put you off, though I would recommended this product to someone with a combination even an oily skin. I just found for my super dry and sensitive skin if I was going to use it every day it was a little too reactive for me and I would end up with an over sensitive face.
Now available on our online store here -> http://goo.gl/QDu9Us and in store
Summer is a distant memory and if you are like myself and are unlikely to catch any rays until Easter, ( I know what a dismal thought) then you'll be back to applying tan, then tan detox, then apply tan, tan detox and so on.
I love a little glow throughout the winter it hides my blue/greyish Celtic skin tone, so here are some tips on how to achieve the perfect tan, more like a little sun kissed rather than looking like you've rolled around in a bag of Doritos.
1. Thou shall always choose a tan that suits your skin tone
It's winter, so less is more. Try to stick to gradual tan or a tanning gel, which will leave a more subtle tone.
2. Thou shall not ever Ever tan without a mitt
Yes a mitt, not an ex foliation glove, sounds so obvious but, A friend of mine made this ludicrous tanning error. The mitt will Not only enhance the results and leave you streak free but it you will save your palms form the dreaded orange look.
3. Thou shall not leave any area untouched
It doesn't matter if you go over an area a few times as it won 't go patchy, but leave an area without tan then expect to have the streaky bacon effect.
4. Thou shall always put moisturiser on hands and feet and then apply tan
I know this sounds a little daunting but, moisturising the skin on the hands and feet directly before applying tan might look messy initially - the next morning when you wash it off you will have the perfectly blended tan
5. Thou shall never leave tan on longer than the recommended development time
I just don't get it when girls insist on leaving their tan on till the next day, believing that it will get darker well it doesn't make the tan any darker, it just makes you look dirtier for longer. If you want to have a darker tan then do another application the following day... Simples
6. Thou shall not shave the day of your tan
This will leave you with with a nasty rash and when your tan develops it will look like your covered in tiny black dots... Not a good look
7. Do moisture daily to make your tan last
This will ensure your tan lasts and also it will prevent you from looking like you have leprosy on the third day.
8. Thou shall never spray deodorant or perfume on a tanned area
The alcohol in the perfume & deodorant will make the tan turn green and a green neck or pits is not very attractive.
9. Do rub ice cubes over your face to seal your pores before face tanning.
A personal favourite for myself as I've saucer-like pores, if I apply tan straight to my face it looks like I have a mass of blackheads the next day. So rubbing an ice cube over my face and then putting a little moisturiser on before I apply the tan leaves me with a authentic looking tan.
10. Exfoilate, Exfoilate and Exfoilate some more
Exfoliation is the keys to a flawless tan, it's all in the prep work. Removing the dead skin will leave you with fresh, soft, smooth skin. The tan will glide on better and therefore develop more evenly.
Here are some of my favourite lighter tans


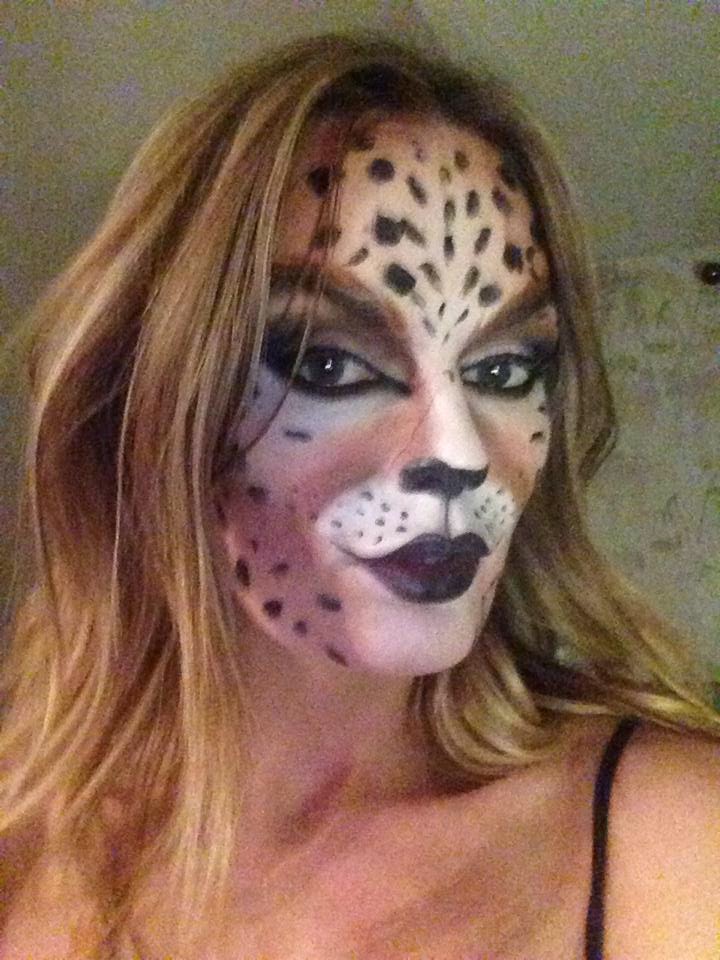
Every makeup artist loves Halloween, the perfect time to go mental with makeup. Here are the prefect products to create long lasting looks.
Krylon facepaints are my favorite for all sorts of ghoulish Halloween looks but you can also use the face paints with regular makeups, I often use the white in the supra Color palette to have a defined eye look, just mix it with a fixing agent and then pack white sharper over it. It's very effective and long lasting.


The products I used and where to find them


Washing your brushes is so important. If you think about it, there is so much dirty makeup, oil and bacteria trapped in an unclean brush, and if you don't wash them properly your just rubbing that all back into your skin! ew!
All those fancy brush cleansers can be really expensive to repurchase over and over again. This technique is used by oil painters and artists to keep their brushes in perfect condition and it works perfectly on your own make up brush too.
These items can be found in your own home so basically you don't need to buy anything! score!

What you will need
A plate
A basic type of dish soap, i'm using fairy liquid. This is to disinfect and cleanse
Extra virgin olive oil (to recondition the bristle hair after its been stripped of oils and disinfected by the soap)
Brush guard
A cup
Step 1
Put the washing up liquid and extra virgin olive oil onto a plate, don't worry if both the liquids touch just don't mix them.

Step 2
Dip the brush into the fairy liquid and rub on the palm of your hand under cold water, hot water will make the brush hairs brittle and the glue that holds them together melt.

Step 3
After you have removed the fairy liquid from your brush, rub it into the oil then massage it in with your fingers and wash off under cold water.

Step 4
dab your brush down with a towel. Don't rub at it as it will make the hairs frizzy.

Step 5
If your serious about the condition of your make up brushes invest in good brush guards. Place your brushes in to the guards and place upside down in a cup. Make sure these are upside down as if they are the right way up the excess water from the brush will go inside the handle of the brush and weaken the glue the hairs are attached by, causing your brush head to fly off mid make up application.
I recommend these


get cleaning!
If your anything like myself you've makeup brushing lying everywhere, but really we only need 10 brushes to complete our kit.

Yes believe everything you hear. Makeup brushes are the most important part of your makeup kit and are vital for that professional flawless finish.
Here are my top 10 brushes that no girl should be without, so give your fingers a break and invest in these tools of the trade.
1- foundation brushes
A choice of 2 here,

Precision cut deluxe synthetic hair
Gives a flawless airbrushed finish
Perfect with liquid foundations, powders and minerals
Densely packed, super soft brush
Saves time Saves the amount of product use
Stylish packaging and branding

blending of face powder or pigments. Use to create soft layers or
add textures. Made from a soft blend of goat and synthetic fibres.
2-concealer brush

A taklon hair brush, great for concealer and perfect for under the eyes.
3- powder brush

Full and dense for dusting loose or pressed powder on face or
body. This brush is particularly good for blush application with
soft fibres that form a full, rounded shape
Full and dense for dusting loose or pressed powder on face or
body. This brush is particularly good for blush application with
soft fibres that form a full, rounded shape
4-blush brush

Small Chisel Blush is a luxurious little blush/contour brush made of
top quality sable and goat hair
http://www.crownbrush.co.uk/c403-small-chisel-blush.html
5- bronze brush

http://www.gordonsdirect.com/real-techniques-retractable-kabuki-brush.html
Use this brush to achieve the perfect cheekbones, use with bronzer or highlighter to define the contours of your cheeks
6- slanted eyebrow brush

I always prefer a slanted brush for the brows, soft natural hair with synthetic fibres, so it great to use wet or dry. Available
at http://www.orlaghmaye.com/index.php/eyebrow/angle-definer.html
7- flat shadow brush

Subtle or loud, fierce or classy, this split fibre brush allows
you create the perfect eye look your after with its signature
mixture of goat hair and synthetic fibers
http://www.maccosmetics.co.uk/product/145/17362/Products/Brushes/Eye/235-Split-Fibre-All-Over-Eye-Brush/index.tmpl
Subtle or loud, fierce or classy, this split fibre brush allows
you create the perfect eye look your after with its signature
mixture of goat hair and synthetic fibers
http://www.maccosmetics.co.uk/product/145/17362/Products/Brushes/Eye/235-Split-Fibre-All-Over-Eye-Brush/index.tmpl
8- crease brush

Using just the tip of the badger hair bristles it’s perfect for picking
up colour. Apply product directly onto the crease and sweep
through. Effect is blended, but defined.
up colour. Apply product directly onto the crease and sweep
through. Effect is blended, but defined.
9- smoker brush

For precision shading on lid, in eye crease or along lash line. The
soft, smooth fibres of this brush are gathered into a pencil-shaped
tip. It is ideal for blending eyeliner into eye shadow to create a
smoky looking eye
For precision shading on lid, in eye crease or along lash line. The
soft, smooth fibres of this brush are gathered into a pencil-shaped
tip. It is ideal for blending eyeliner into eye shadow to create a
smoky looking eye
10- lip stick brush

http://www.thebodyshop.co.uk/make-up/brushes-and-tools/lipstick-concealer-brush.aspx
This dual-purpose brush can be used to outline and paint lips or to
precision-apply concealer.
What is that old saying "only a bad workman blames his tools", will as far as I'm concerned a really good makeup artist , uses really good brushes. Not just expensive ones but good quality ones. I know when your buying new brushes there are so many, it can be really intimidating especially when you haven't a degree in makeup artistry. So, basically this is the simplest rule to follow.
# synthetic hair - for liquids or creams (foundation, concealer, lipstick etc)
# natural hair - for powders (blush, shadow, bronzer)
I've heard a lot of hype about this wee brush and wanted to see what all the fuss was about so here's a product review on Ciara Dalys "My Hero Brush".
Available to buy here : http://www.orlaghmaye.com/index.php/makeup/brushes.html
Ciara Daly is a Belfast based makeup artist. As well as weddings, fashion and photographic work she offers makeup training for the aspiring and the qualified makeup artist.
As I'm a makeup artist myself I wanted to see if this brush was any good and to be honest I wasn't really expecting it to be something that I would stock in my own salon.

First the packaging, as you can see its simple, clean and straight to the point.
Packaging is always a big thing for me, having a salon myself I think it has to be eye catching and the less fussy the better!
 Packaging is nearly 50% of the sale after all.
Ciara has got this spot on even down to the retail bag!
The makeup brush also comes with a leaflet with application methods for using the Hero Brush, which is very handy indeed.

The brush itself is a Kabuki brush which is compact and doesnt require to much space in any cramped
makeup bag.
It is soft over your skin, actually feels quite therapeutic. I felt when I was using it on my clients I really had to work it into the skin and wondered if it felt rough, but they assured me that it was smooth, soft and actually felt delightful.
You would think that you would need a lot of foundation or like a lot of other brushes that the foundation gets lost and you end up wasting it. Especially when you have to put it directly onto the the My Hero Brush, but no, one squeeze, four dots on the face and a little circular wrist action and it's perfectly buffed into the skin. No lines, no streaks just perfectly applied foundation. It's also great for brushing away any shadow dust that has fallen on to the cheeks or under the eye area.

The only negative I found with the My Hero Brush was not with the actual brush itself but the packaging, I would liked to have seen information on the materials used for the hairs and also if it was cruelty free, even if there was a little information leaflet inside the box. For me this would be important.
But with everything considered it's an amazing brush, which will be available in my salon and online at www.orlaghmaye.com and it will have a permanent place in my already overcrowded makeup bag.
Please don't forget to subscribe to my blog for regular updates
Interested in this product? Buy now and have it delivered straight to your
This Autumn/Winter 2014 eyes are the focus, sorry lipstick junkies!
October is upon us, so I thought I'd do a quick warm smoky eye look for those cosy autumn nights.
I took my inspiration from Cara Delevingne, she loves a brown smoky eye!

http://www.blacklockbeauty.com/wp-content/uploads/2014/04/cara-delevingne-wearing-burberry-make-up-to-the-metropolitan-museum-of-art-2013-costume-institute-gala1.jpg
For this look I'll go with Harlotte smoky brown palette at £45 but now on sale for only £38 here
http://www.orlaghmaye.com/index.php/makeup/eyes/eyeshadow/harlotte-smoky-brown-palette.html
http://www.orlaghmaye.com/index.php/makeup/eyes/eyeshadow/harlotte-smoky-brown-palette.html

Available from http://www.orlaghmaye.com/index.php/makeup/eyes/eyeshadow/harlotte-smoky-brown-palette.html
Four matte shades and one shimmer
1- dark brown matt
2- black matt
3- lighter tan matt
4- ivory shimmer

Team it with harlottes lipstick in exposed £15. On sale now here


Harlotte eye shadow palettes are a personal favorite of mine, high impact, pigmented, durable and long lasting. They probably seem a little highly priced but I promise you won't be disappointed!
With the dark nights only around the corner, luxury, opulent and moody eyes are always a favorite fall/winter makeup. You should vamp it up a little in the winter nights, with more dark colours to compliment the changing seasons.More lashes and more liner! But always keep the skin minimal and natural. Control yourself with that contouring palette ladies ;)

Backstage at the autumn/winter shows it was all about the eyes and natural skin. Outlandish eyes with greens, lilacs, metallic and reds. Dior went with liquid latex on the eyes, lilac was a winner for Chloe, Versace went with super long lashes while Alexander mc Queen opted for eye catching feathery brows.
I wanted to try and create a luxurious autumnal makeup look with Karaja Aqua colour eye shadow no.22.

Ok, the shadow is highly pigmented, with a metallic effect and just enough sparkle. It can be used dry for a lighter finish but use with a damp brush for maximum results, my personal favorite!
I couldn't believe how strong and long lasting the colours were in this palette, I just wasn't expecting this bang for your buck. Its priced at £18.50 from here

1. Perfect burnt orange
2. Deep plumb with pink undertones
3.Highly pigmented metallic gold
My inspiration for this makeup was from the Givenchy autumn/winter 2014 collection. From snake print to butterfly's, the collection was full of deep browns, oranges, reds and plums. For me Givenchy completely captured the luxury of those autumn evenings.

The first 3 images of my makeup are filter free, the last one (4) is filtered.
I started with a triangle of gold shadow in the middle of my lid, then used the plum in the outer and inner corners.

I blended the colours out with the burnt orange

I lined the eyes with Harlotte smudge eyeliner in black and then smoked out first with burnt orange and then with gold.

I finished the look with Harlotte cheater lipstick.

So what do you think?
Please don't forgot to subscribe to my blog, by going to the main page a add email in follow by email, you will then get a confirmation email sent to you, then you can activate your subscription.
Ok so finally I'm doing a review on some of Topshops makeup. I'm just dipping my toe in a little, so it's only three products that stood out the most, I want to test the waters before I complete a full haul.
When Topshop first announced they where releasing a makeup range in 2010, I wasn't that excited. Basically another high street range, blah,blah,blah.
So I've went and I have completely contradicted myself, and actually bought some, and might even like it.
My first Topshop purchase was the Smokey Eye Palette in Golden Aura which costs only £12.00

It is a natural palette coming in four shades, yes that's correct only £3 per shadow.
1- dark cool brown with kaki green undertones
2- warm light brown
3- champagne
4- ivory

All shades have a shimmer to them, which I found to be quite disappointing. But actually once it's applied they sort of fade and you could totally do a day look as well as an evening with this palette.

But I just love a wee smoked eye.

I know my packaging is a little dirty, it wasn't when I purchased obviously. I'm just a messy chick when it comes to makeup.
The case is cute, there is a mirror inside within application and also little steps for doing different eye shadow looks.
This palette is value for money! At only £3 per shadow Topshop you just can't beat it. I did use my favorite Urban Decay eye shadow primer potion which I think really helped with the longevity. It's highly pigmented , the shadows are great classic staple colours, nothing I haven't seen before though, and we have to remember it's a budget palette so it hasn't the same quality of a Dior or YSL, the with that price, it's worth having in your makeup case.
My second purchase from Topshop makeup is the Topshop Lipliner in Deception I wanted to try a little two tone look so I went for the Topshop velvet finish lipstick in Depth.


Topshop Lipliner in Deception £5 available from
http://www.topshop.com/en/tsuk/product/make-up-431/lips-471/lip-liner-in-deception-62056?bi=41&ps=20
The Lipliner is a deep red in colour, I found it went on perfectly. Just glided like butter over the lips and stayed in place. Such a beautiful deep, rich red perfect for the holidays.


Topshop velvet finish lipstick in Depth £8 available from
Now on to the gorgeous Topshop velvet finish lipstick in Depth. A deep burgundy, it's a smooth moisturizing lipstick that has a matte finish. I didn't find that it lasted that long and it doesn't have a colour that flows over the lip, it's sheer in places and has to be reapplied a few times to get a deep colour over the full lips. I feel a matte colour should have a lot more depth in it, but the colour for me is stunning.

Easy evening look
This is a very versatile palette that can be used both day and evening.

Day look
All in all the few pieces I purchased from Topshop where value for money and good enough quality. Now I just can't wait to some Autumn winter collections arrive.
Don't forget to subscribe to my blog for all the lastest tips and reviews straight to your email.
You either love them or hate them, it's a bit like the girl with the straight hair who spends too many hours trying to perfect the bounciest of curls or, the girl with the curly hair spending her mornings with the straightener at a temperature that could melt iron.
Basically we always want what we don't have! Most of my friends with freckles spends hours trying to hide them with mask like foundations. A face well scattered with youthful freckles is bang on trend this summer.
So, Gals stop hiding those freckles just embrace them.

The freckle pencil was first uncovered to me when I was browsing the pages of my favorite magazine www.vogue.com just this summer. I know other makeup brands have had freckle pencils in the past like Chanel and Lancome but they never really excited me.
freckle pencil in forever young - £5.00
freckle pencil in forever young - £5.00

Picture from www.topshop.com
What drew my attention to this one was
Topshops freckle pencil boasts a "3D marbleized formula" which basically means it has to different shades of brown, to help mimic the natural freckles more, so each freckle becomes unique.

When apply the freckles vary the amount of pressure to ensure each freckle is a different shape and size as natural freckles are all unique and If they all look the same it's not very natural looking. Just think of where the sun would usually tan you the most, over the bridge of the nose and slightly over the cheeks, but don't put on the apples of the cheeks.
Even scatter a few around the eyes and cheekbones. It's so important for them not to be uniform, so be as random as possible. After applying the freckles dust with a light setting powder.
Even scatter a few around the eyes and cheekbones. It's so important for them not to be uniform, so be as random as possible. After applying the freckles dust with a light setting powder.

I always think freckles look best with bold brows and summer lips, or even with smudged brown or metallic eyes. Just wear a light foundation or even a tinted moisturizer. But if your confident enough just wear them with a Brigitte Bardot eye and a red lip.

This spring/summer 2014 the catwalks where awash with barefaced beauties. From Victoria Beckham to Michael Kors and Dolce & Gabbana.

The most important thing with the freckle pencil is - do not touch your face after applying. They will smudge and you will look ridiculous. Once set with the setting powder don't even think about scratching you nose.
I know it's a little early to be doing Autumn tutorials but when shopping in House of Fraser Belfast, the new YSL collection caught my eye, TBH I just couldn't resist the temptation of a little makeup splurge - I haven't shopped in weeks after all ;)

I wanted to do a take on the Cara Delevingne shoots for YSL Black Fetiches autumn 2014. I love the exaggerated shadow on both top and bottom, a different take on the whole cat eye.

House of Fraser YSL display

The Black Fetish collection is inspired by leather, it's a chic yet edgy collection, with beautiful texturised coppers, browns, golds, blue, greens and blacks.
But one product stood out more than any other and that was the YSL limited edition Collector Fetiche Couture Palette £42
http://www.houseoffraser.co.uk/
http://www.houseoffraser.co.uk/

It just sums up Autumn for me, the scrumptious warm coppers, bright golds, cool brown, petrol blue and matte black. Reminds me of Autumn leaves, open fires and cosy evenings.

A little colour swatch to see how amazing these colours are

And now for the close up

Step 1 - prime eye

Step 2 - apply gold illuminating shadow to the lid area

Step 3 - use a small brush and press the copper into the crease area

step 4 - apply kohl eye liner to top and bottom lash line and water
line and smudge out

Step 5 - apply petrol blue shadow to top lid and exaggerate the blue in a
wing effect

Step 6 - apply navy shadow under lower lash line, also exggerate this out but don't join top and bottom shadow

Step 7 - put the gold illuminator into the inner eye

Step 8. - use a cotton bud dipped in eye makeup remover to sharpen wings

To finish the look I use a slick of red lipstick in the new YSL Rouge PurCouture The Mats in 209 Red Rhythm - vibrant red £25 www.houseoffraser.com

For contouring the cheeks I used Karaja Gold & Bronze no.60, available at www.orlaghmaye.com


Harlotte Cosmetics have launched their on-trend sensational Brights collection which is available in 4 vivid shades
Hellcat – Vibrant red
Mistress – Vibrant watermelon
Cheater – Vibrant tangerine
Temptress – Vibrant fuchsia
As I’m sure you already know I am in total love with the whole Harlotte range but I’m so happy they have extended their incredible makeup range and added some bright lippies. After all every girls needs a red lipstick her life.
Moisture infused and even better - wears long! Each of the four colours will most certainly get you noticed
Temptress
I heart Temptress -. Flirty, fun and feminine. Perfect for date night. Wear with loose curls and a strappy dress.


Cheater
The quickest way to brighten your day – add a slick of Cheater lippy. This citrus-y shade screams statement-making colour. Picture yourself with a drink in your hand and a toe in the sand. A slick of this lippie will instantly leave you feeling stimulated and uplifted.


Mistress
I’m hooked on this warm hue, perfect with a tan and makes your teeth look so sparkling white. It’s a warm juicy fruity watermelon-y colour full of energy and gives you an instant holiday feeling.
Soft, warm and energetic


Hellcat
This red amazingly suits most skin, eye and hair tones. It’s the first red lipstick that I have been able to keep in my kit and use on most clients. It’s a sensual, passionate colour perfect with a slick of liner or even the smokiest of eyes.


Glam Glow Mud Mask Review

When I first bought this I thought I probably wouldn't be able to use it, considering my skin is a sensitive little soul, so much so, that even when I’m told a joke I break out in hives! But there was such a hype about GlamGlow - I knew even a possible skin crisis wouldn't stop me.
I’m a beauty product junkie and I must get my highs!
What They say
This performance driven super mask is an absolute must for those who seek the highest quality ingredients and exceptional results, even if you have never used a mask before – YOUTHMUD is unique. It doesn't just take care of one skin concern, it delivers everything you need for great skin, whatever your skin type.
YOUTHMUD delivers both instant and cumulative results and leaves your complexion revived and glowing for 3 days after each application. With its heritage in Hollywood film studios, YOUTHMUD has flown off the shelves stateside and is now available in the UK.
What is in it?
GLAMGLOW's mud base is from Southern France, home to glamorous Cannes, St. Tropez and Monaco.
Teaoxi™ - Patent Pending formula is GLAMGLOW®’s continuous time-release technology, delivering fresh Super-Squalene, EGCG Super-Antioxidants and Polyphenols directly into the mud from real pieces of Tea Leaf. Super powerful TEAOXI™ is responsible for brightening the complexion, protecting against free radicals, hydrating and balancing the oil levels in the skin.
Volcanic Minerals - Pulverized into Micro Pumice, these ancient rock minerals give multi-level surface exfoliation and stimulate microcirculation, helping to detoxify and awaken the skin, reduce puffiness, under-eye circles and smooth fine lines while softening the skin’s texture to reveal younger looking skin.
French Sea Clay - Dredged off the coast of Southern France and when combined with TEAOXI™ a tingling sensation is created, triggering 12 hours of Collagen Synthesis for a noticeable wrinkle deduced 3-day glow. French Sea Clay absorbs impurities and toxic substances reducing pore size and helping to look younger by reducing the appearance of age.
How to use it?
GLAMGLOW is designed to work in harmony with any daily skincare brand regime and is the ultimate instant skin rescue product for any occasion.
For best results apply in a medium layer with a foundation brush to clean skin. The mask will tingle as it tightens and brightens the skin. Leave GLAMGLOW on for 5 to 10 minutes or until the mask fully dries and rinse off with water, using circular motions to deepen the level of exfoliation.

Use GLAMGLOW once or twice a week or whenever your skin needs an instant boost. Store in room temperature.
My Thoughts
Even though GLAMGLOW say to leave it on for 5-10mins I only keep mine on for 5 mins. I wanted to air on the side of caution, as I didn't want my super sensitive skin getting angry with me.
When it was first applied, my skin felt cool and quite calming, as the time progressed, the mask began tingling and hardening. The tingling was a little daunting. That’s why I left it on for a shorter period of time than recommended, any loner and my skin was possibly going to wage a war against me.
You can see in the image below where the GLAMGLOW has dried up and my pores are visible, this is whee the product is beginning to draw out any excess oils.

It smells truly refreshing. Clean and pepper-minty fragrance, that just screams clean pores.
I used a white cotton face cloth soaked in warm water to help remove the mask. I advise you not to use a white face cloth as mine is now in the bin.
After removing the mask my skin feels clean fresh and thankfully not sensitive at all, I did feel the need to apply a cream after as I was a little tight. My pores where noticeably reduced and my skin just felt and look brighter. My Skin was also less oily and more balanced as you can see in the image below.

If I had to describe this mask I would say its a great product to prepare you for a big event, wedding, date or even a job interview. Some people would use it the day of their event but I would never use it the same day as I might have mentioned before “I have super sensitive skin” and I wouldn't risk any hitches.
Make sure you close the lid securely as the mask will dry up completely. As you can see from the image below I didn't follow protocol and ended up with a pot of cement.

A great product, which I will continue to use.
8 steps to a feline flick
Step 1 - Eye primer

Step 2 - Draw a < in the inner corners of your eye with Harlotte Divine Line in Jet Black

Step 3 - Drag liner straight along lash line. Stop 3/4 of the way across

Step 4 - Choose a point where you want the flick to end

Step 5- Join the line to the dot, gradually working upwards

Step 6 - To clean any mistakes use a cotton bud dipped in rich moisturizer

Step 7 - Line water line with Harlotte black smudge liner and smoke out

Step 8 - Add mascara & Harlotte Drama Queen Lashes to complete the look


Buy here http://www.orlaghmaye.com/index.php/makeup/eyes.html
Harlotte Eye shadow Palettes
Smoky Eye Palette – spring

1 x Turquoise sparkle
1 x Aqua blue matte
1 x Cornflower blue shimmer
1 x Navy Blue matte
Rock the boldest blue eyes this summer with my favorite brand Harlotte’s Smoky Eye Palette in spring.

photo by juergen teller for nylon magazine
Blue eye shadow was everywhere for Spring/Summer 2014 from Marc by Marc Jacobs, Miu Miu, Anna Sui to Prada everyone was in a blue mood.
Ok blue eyes, my first thought is Eighties disco fever or the local beauty therapist (who should have retired years ago) with her blue
shimmer eye shadow , pastel pinks lips and powerfully applied rouge. But it all depends on how you keep it modern.
The Trick for making the blue look modern
- Always keep cheeks and lips lighter, to let the eyes really stand out.
- Never use too much shimmer or you will be transcended back to that 80’s disco. I think the matte shades work best in the crease and up to the brow bone.
- Never match your blue eyes to your eye shadow, always try a different shade of blue to make your eyes pop.
- Always blend, blend, and blend. To save it from looking cheap use a professional brush. No licking the fingers please
- Always use softer more matte hues on mature ladies and keep the vivid shimmery shades to the youngsters. But over 60 should avoid this colour altogether.


Harlotte shimmer palette
This highly pigmented, long lasting palette from one of my most loved makeup brands , can take you straight from day to an evening look. It has four shimmered colours.

Karaja Igloss
If
you’re a Gloss Girl, then this is the one you've been looking
for. Keeping your
lips lusciously hydrated and plumped. It
’s perfect with a sexy smoky eye or
with a fresh clean day time look.
The below image is the colour change when your lips are a cooler temperature

The below image is the colour change when your lips are a warmer temperature

What
They Say
It’s a
clear, light gloss that reacts on contact with your lips to become a delicate
shade of pink. Karaja claim that each colour is unique and original because,
upon application to your lips iGloss adapts to your skin type.
What I
think
I totally agree that each colour is unique and
original but I would imagine that the colour change depends on your skin
temperature and not your skin type; I just can’t see how skin type would
dictate the colour. But maybe that’s something I could write to Karaja and get
an answer to.
It’s
priced at £10 for a small tube; the packaging is basic in a plastic sleeve. Its
long-lasting on the lips but you do just want to keep reapplying as the Aloe Vera
extract moistens the lips, leaving them so soft and silky.
The
gloss for me is the perfect shade of pink; it totally enhances your lips
without making them look made up. It really makes the lips look soft and seductive.
Wear this lip gloss and make your friends insanely jealous of your luscious
lips.

Yeha new karaja delivery!

Summer survival skincare
Changes in the weather can cause
havoc with your skin, and the arrival of a new season is the perfect time to
reassess your beauty regime accordingly. When the seasons change your skincare
regime should change too!
So its time to give your beauty
regime a good overhaul.
Nothing is worse for the skin
than a long, cold winter. The heating on full, harsh weather and the lack of
fresh air has left me looking dry, dull, cracking, sensitive and dare I say it
- wrinkled!
Here are my 5 Top Tips for Spring
Skin, to get rid of the winter skin blues
1: Always Use An SPF
Don’t assume you’re inoculated against sun damage.
Its actually the UVA rays which are present all year that are responsible for
premature ageing they can even travel through the car windows. So slap on the
SPF and whatever you do - avoid the electric beach. I have first hand knowledge
of the damage it can cause, as i was a sun-bed devotee in my late teens and
early 20’s. If only I knew what I know now! It gives you pigmentation,
fine lines and basically speeds up the skins ageing process. So, its imperative
to use your SPF not just in the summer but also the winter months.
2: Lighten Up
With the cold winter months
behind us, ditch the heavy moisturizing cream and opt for a hydrating gel or
emulsion. It will be much lighter on the skin and wont have you looking like an
“oil slick” half
way through the day.
3:Focus On Cleansing
Cleansing is arguably the best
route to younger-looking skin. Your cleansing ritual is the most important part
of any skincare regime. I prefer a cleansing milk or balm to a foamy cleanser.
Your skin needs to feel clean, not tight. If it does feel tight after your
cleanse it is likely to be too drying for you. Apply your cleanser in a
circular motion and ensure you rinse it completely from your skin.
4: Have a Monthly Facial
A monthly facial is essential to keep
the your skin looking fresh and spring clean. Monthly professional facials will give
you a much more targeted skin cleansing routine, more active professional
products will be used and you will have your skin analysed. Its a treat for you
skin and will keep it looking its best, a deep or lymphatic massage will help drain toxins from the skin. And we all know Toxins mean fine lines,
blemishes and dull irritated skin. This also means you can also choose your
home skincare routine with more confidence and knowledge.
5: Exfoliation
Exfoliate, exfoliate, exfoliate. No
matter how you want to remove that top layer to revive your youthful glow.
Scrubbing that skin is the essential. Never use big grains on the face, the smaller
the grain the more gentle yet effective o the skin.

Image credit - Migro S
Harlotte nude Lipsticks and lippie pots
Harlotte nude Lipsticks
and lippie pots come in twelve luscious shades.


I just love the
smoky eye and nude lip for a night on the town but find it hard to get a good
punchy collection of nudes. That was of course until I discovered Harlotte
lipsticks and Lippie pots.
The creamy formula
leaves my lips feeling ultra moist.
It has a healthy amount of shine and feels
quite lightweight. There are 12 shades available from the cooler Nude Pinks to
the warmer Nude browns that will make even the bold lip lovers go head of
heels.

I put the lip colours on a white background to show the more nude colours that you cant see on my arm swatch.

The packaging is feminine yet chic and the lippie pots are perfect for
nights out! Slim line little pots with mirrors which can fit perfectly into
your skinny jeans, bra or for any bridal emergency touch-up they can be stored
in the hidden pocket in the sexy Harlotte garter.

It has a pleasant
soft clean baby smell. The scent has such a strong draw that it just lures you
in for another sniff.
I didn't find much
transfer even after my second bowl of pasta ;)
I usually suit a
cooler shade so my favorite shades are “bride’s Nighty” and “Peak-a-boo"
Dior golden nude highlighter

I love a good highlighter, well tbh I’m a
total highlighter junkie.
I purchased The Dior skin Nude Tan (Transat
Edition) Golden Shimmer Powder limited edition highlighter, just over a week
ago and haven’t put it down. My brides in particular love it on their
décolletage and shoulders.
Just look at this marvelous creation, the
packaging is so opulent and sophisticated. Even if it was dreadful (which it isn't) it would still sit center stage on my dressing table just for the pure
splendor of the case.
But obviously what’s on the inside actually
does matter in this instance.
The highlighter is housed in a silver
compact with the cannage design. It comes with a kabuki brush and retails at £40.
Dior DreamSkin

Perfectly named Dreamskin. I actually just randomly stumbled upon this product when I was in Debenhams purchasing other beauty products. I'm not usually a lover of Dior skincare as I always find it too heavily perfumed for my super sensitive skin.
Well, I was pleasantly surprised just after the first application. Some might think for a 30ml bottle £79 is rather pricey but I haven't even open my actual retail bottle an I'm still using the little tester I was given, and that's been twice a day for 1 week and there is still some remaining.
Its basically like a primer with anti ageing properties. It can be used on its own or after your skincare regime. I use mine after my daily regime as my skin is quite dry and sensitive.
It is a peachy pink, shimmer thick serum like cream. As soon as it went on, my skin felt smoother, looked less red, brighter and my pores were noticeably refined.
I would suggest if you have oily skin this might make your skin look more oily as there is no oil-control in it. But for my leathery skin it is perfect. My skin looks luminous and glowing, but with a matte finish and I found my makeup stayed on all day.
there is a soft floral smell which is not over powering and the packaging(as too be expected from Dior) is glamorous and elegant.
A product I will definitely re-buy and add to my ever expanding daily skincare regime.


.jpg)
No comments:
Post a Comment